Setting up your club page
Last updated 20 August 2026
Your club page is where people discover and learn about your community. Here's how to make it shine.
Accessing your club settings
- Go to your host dashboard
- Click Settings in the sidebar
- Open the Profile tab to edit your club's details
If you manage more than one club, use the club switcher at the top of the sidebar to choose which club you're editing.
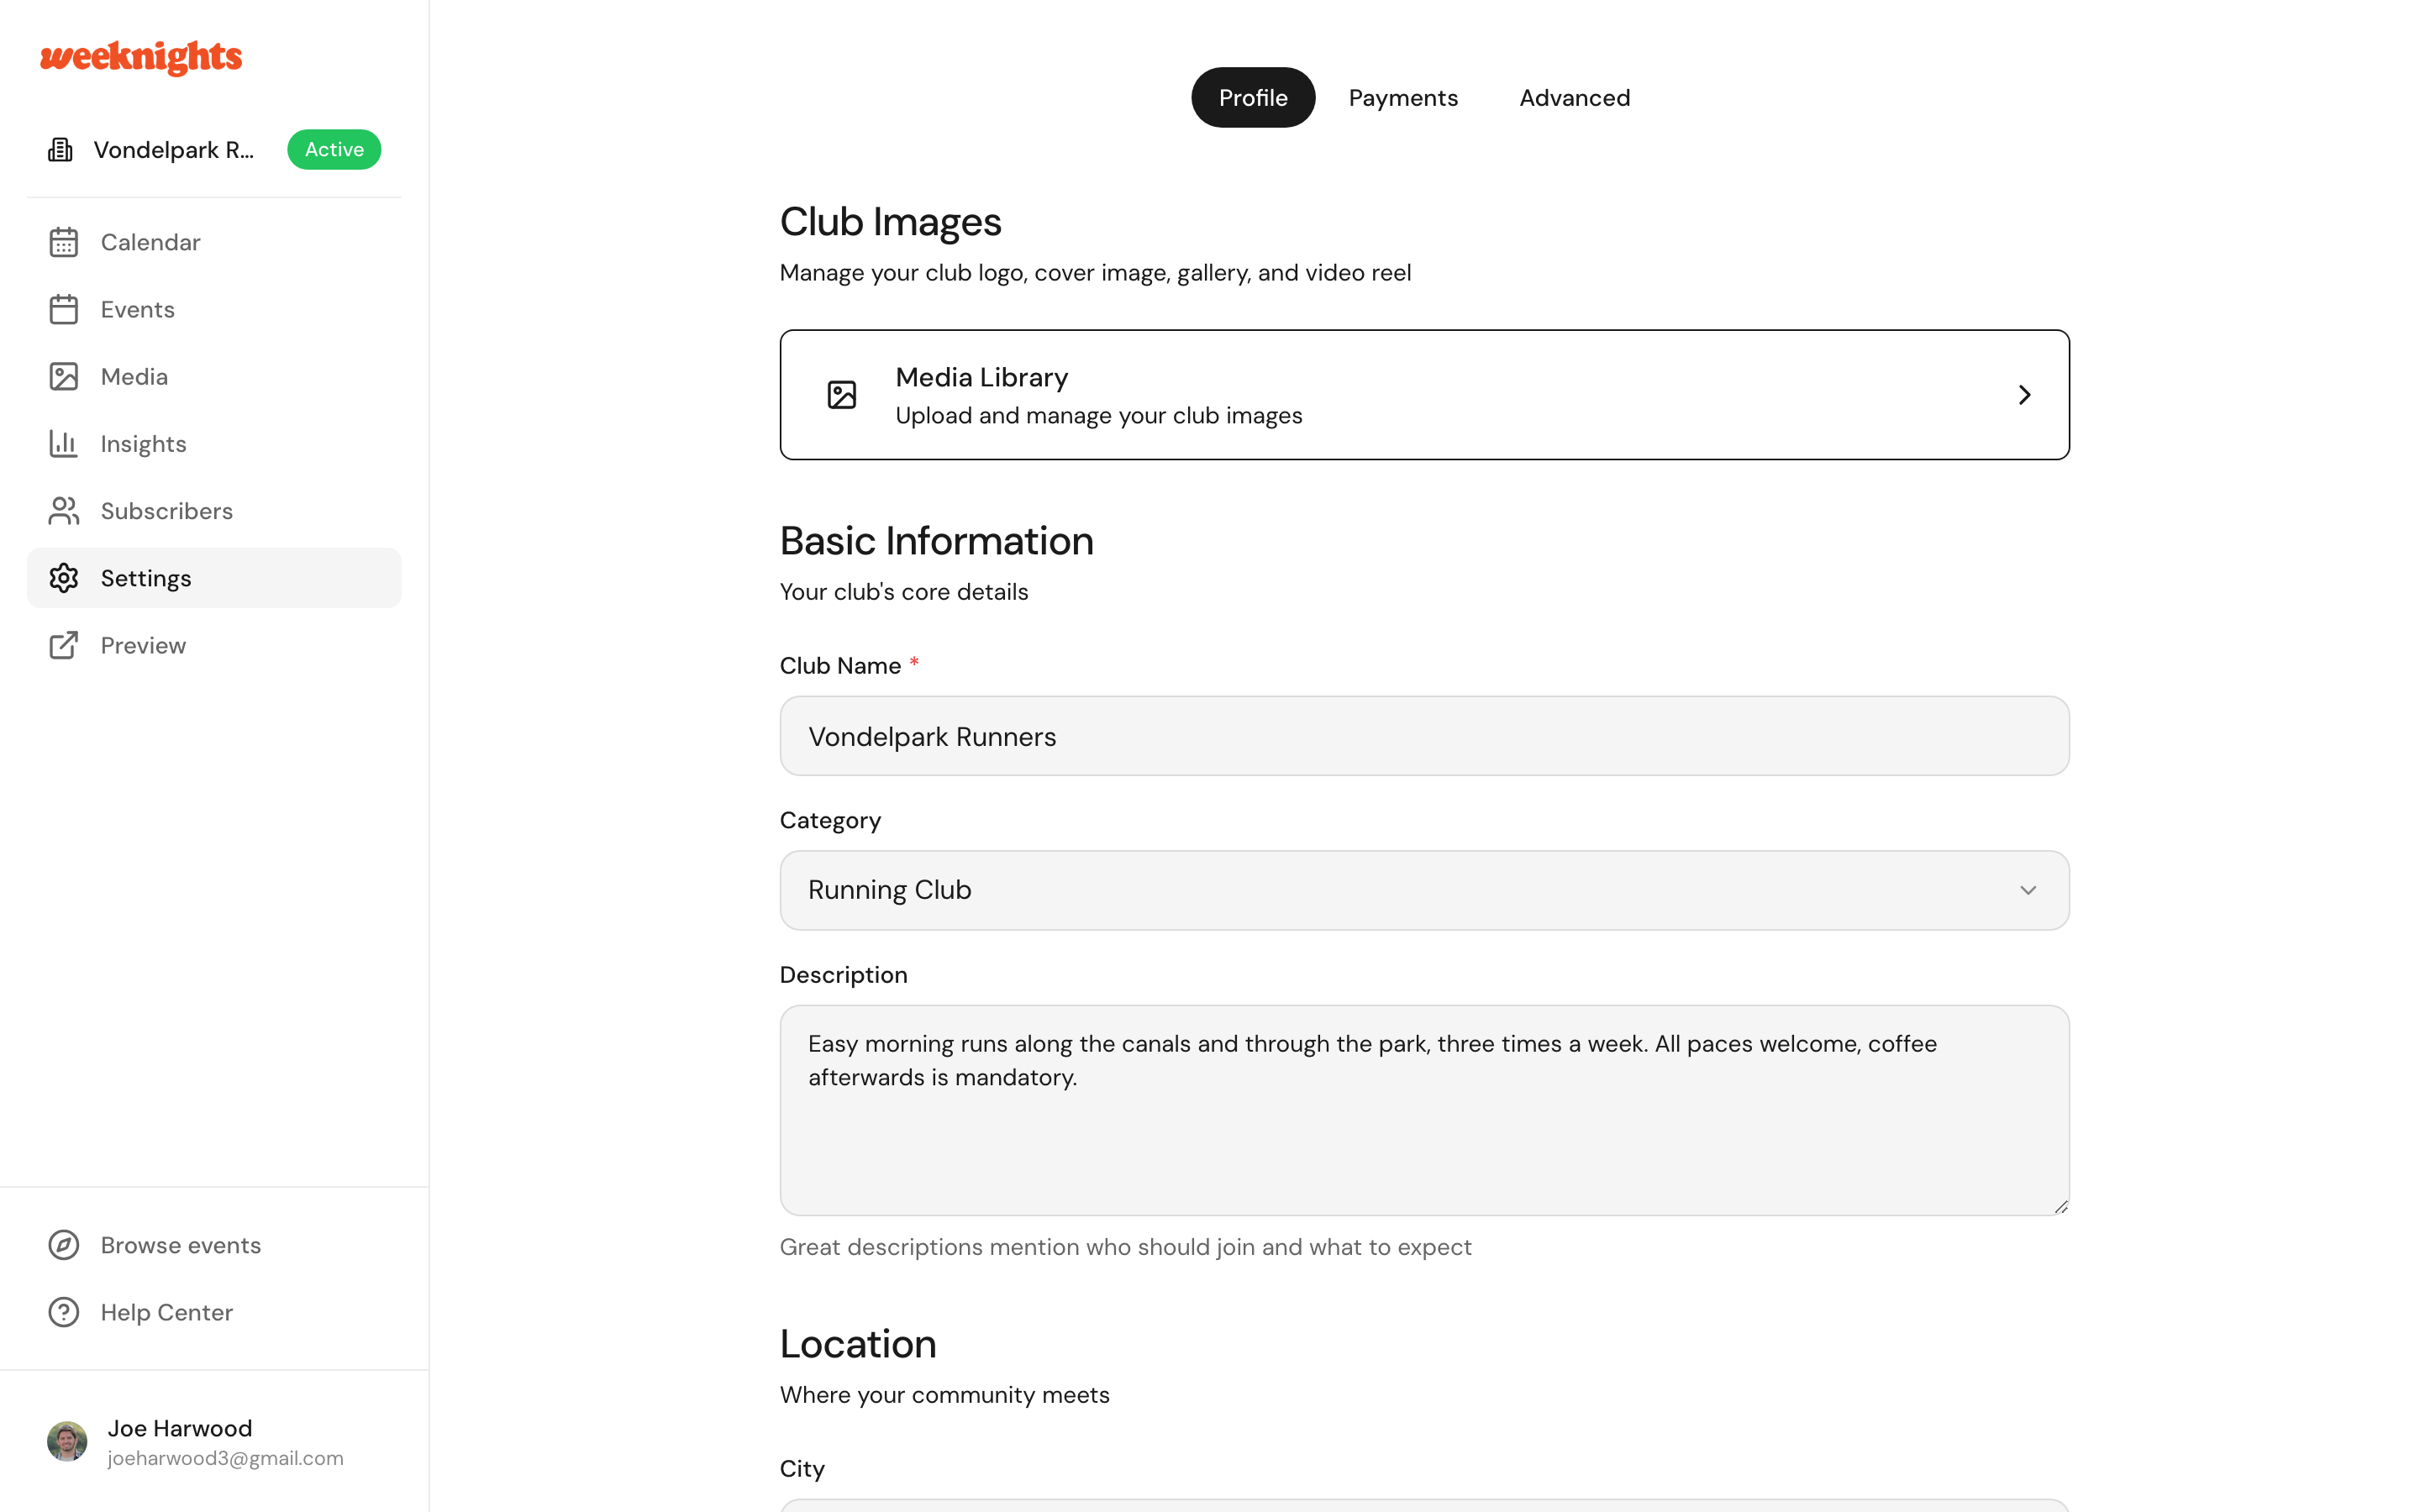
Basic information
Club name
Choose a memorable name that reflects your community. This appears on your club page and all your events.
Description
Tell people what your club is about:
- What kind of events do you host?
- Who is your community for?
- What can members expect?
Keep it concise but compelling - this is your chance to attract the right people.
Cover image
Upload a cover image that represents your club. For best results:
- Use a high-quality image (at least 1200px wide)
- Choose something that captures the vibe of your events
- Avoid text-heavy images
You can manage more photos for your club in your host dashboard > Media - your gallery appears on your public club page.
Social links
Connect your social media accounts so people can follow you:
- Website
- Strava
These appear on your club page and help build trust with potential attendees.
Your subscribers
People can subscribe to your club to get notified when you post a new event. See who's subscribed under your host dashboard > Subscribers.
Viewing your public page
Use the preview link in the sidebar to see how your club appears to visitors. Share this link to promote your community.
Next steps
- Creating an event - Publish your first event
- Getting started as a host - Overview of hosting